Uninstall Sitecore Instance Manually
In this blog, I will let you know how to completely remove the Sitecore instance from your machine manually. While installing the new instance we face the error regarding SQL Server, Sitecore Identity Server, etc. To overcome this situation, perform the below steps to entirely clean the old Sitecore instance and you can go with a smooth installation of the new instance.
- Stop the IIS and remove the configuration:
- Delete Sitecore Service:
- Delete the file system:
- Remove the entry from the host file:
- Delete the database:
- Stop Solr service:
- Delete the SOLR search indexes:
- Delete Certificates:
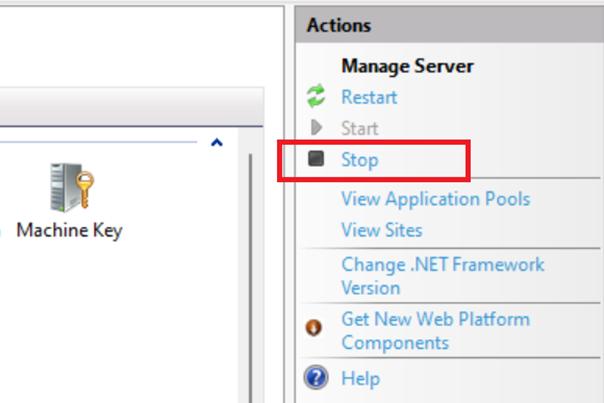
Open the IIS server and in the right panel Action tab click on Stop.
Again, in the left panel right-click on the Sitecore instance and choose the Remove option.
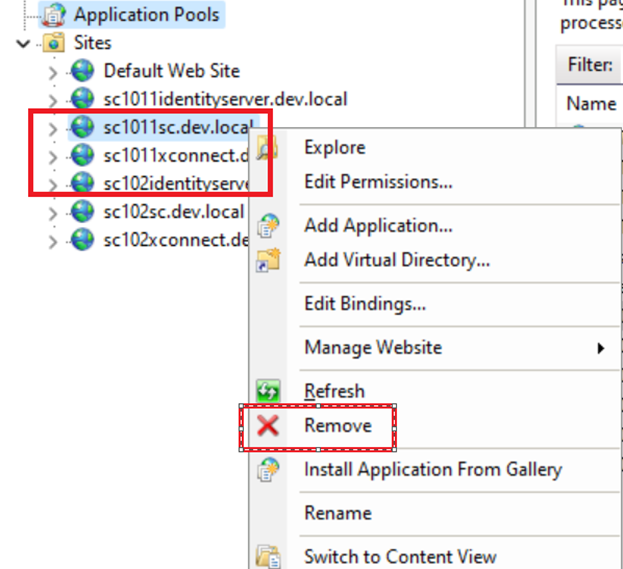
In the left panel go to the application pool, select all respective Sitecore Instance application Pool and choose the remove option from the right panel. For example, in this blog, I am deleting the "sc1011sc.dev.local" instance.

Go to the Service window, Press the Win + R key, it will open the run window. Then, type "services. msc" and hit Enter.
Go to your Sitecore instance services and stop services.

Open the command prompt in admin mode and delete all the respective services using command "SC DELETE servicename"

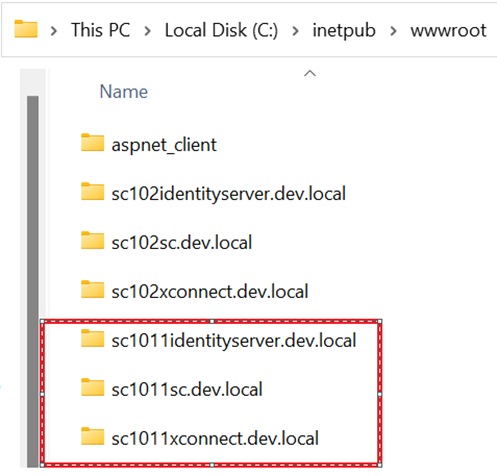
In your local machine find the location of your Sitecore instance. Normally it's at location "C:\inetpub\wwwroot"
Delete all the respective Sitecore instance folders.
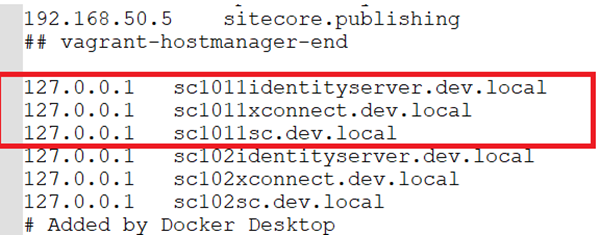
Go to the path of your host files entries. Enter the path in the Run window: "%windir%\system32\drivers\etc\hosts"
Find the host entry of your Sitecore instance entry and delete those lines.
Open the SQL server and delete the related database of your Sitecore instance from the left panel. Right-click on each database and choose the delete option from the menu.
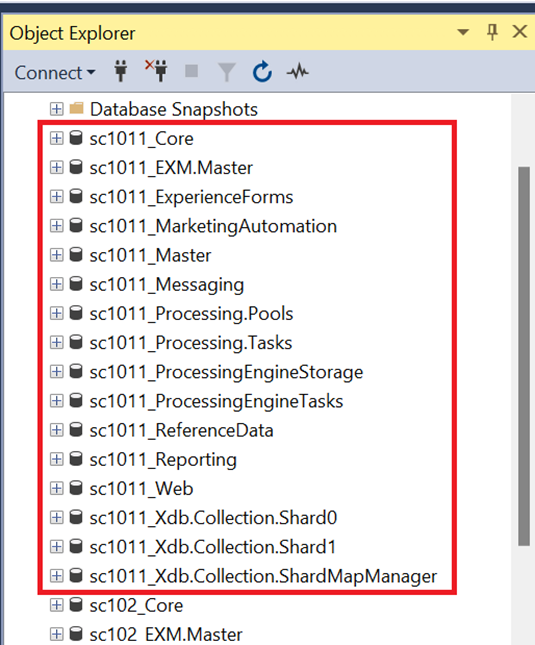
Or use the below script to delete the database and revise the script accordingly.
 USE master
 DECLARE @scInstance SYSNAME , @sqlQuery VARCHAR(MAX)
 SET @scInstance = 'sc1011' -- Your Sitecore instance name
 SET @sqlQuery = 'DROP DATABASE {0}_Core
  DROP DATABASE {0}_ExperienceForms
  DROP DATABASE {0}_MarketingAutomation
  DROP DATABASE {0}_Master
  DROP DATABASE {0}_Messaging
  DROP DATABASE [{0}_Processing.Pools]
  DROP DATABASE {0}_ProcessingEngineTasks
  DROP DATABASE {0}_ProcessingEngineStorage
  DROP DATABASE {0}_ReferenceData
  DROP DATABASE {0}_Reporting
  DROP DATABASE {0}_Web
  DROP DATABASE [{0}_Xdb.collection.Shard0]
  DROP DATABASE [{0}_Xdb.collection.Shard1]
  DROP DATABASE [{0}_Xdb.collection.ShardMapManager]
  DROP DATABASE [{0}_EXM.Master]
 '
 SET @sqlQuery = REPLACE( @sqlQuery , '{0}', @scInstance )
 EXEC( @sqlQuery )
Press the Win + R key, it will open the run window. Then, type "services.msc" and hit Enter. Go to your Solr service and stop service.

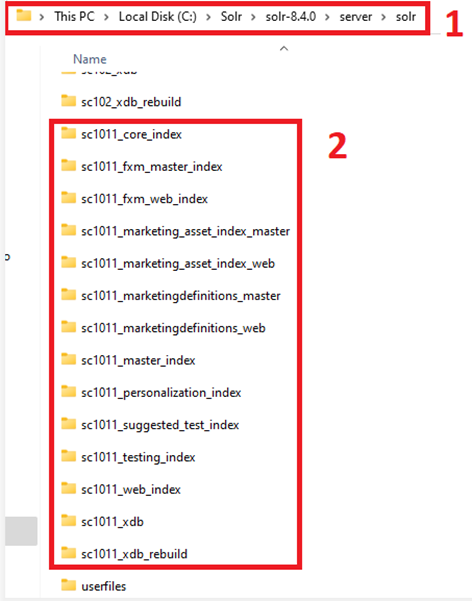
Go to the Solr indexes directory on your machine. In my case, it's "C:\Solr\solr-8.4.0\server\solr" and delete all the Solr indexes related to your Sitecore instance. After that restart the Solr service again.
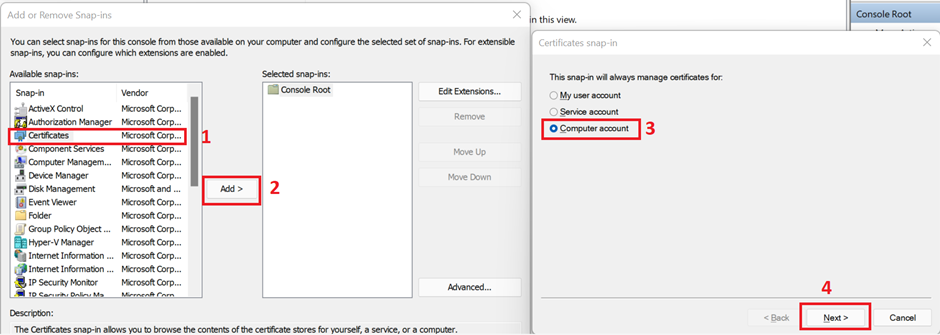
Execute the MMC command into the Run windows and open Microsoft Management Console. Select Add or Remove Snap-in option from the File Menu.
Select Certificate Snap-in from the left panel and click on Add Button. In the next window go with the Computer Account option and click on the Next button.
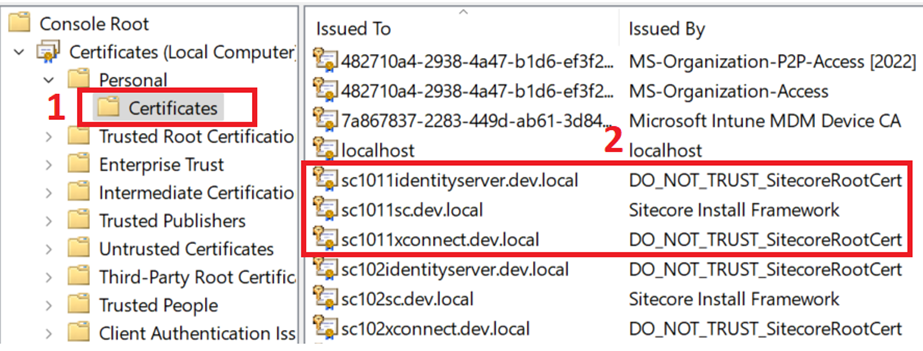
You will get a list of all certificates. Find the name of the certificate with your Sitecore instance, right-click choose the delete option and remove all the certificates.
Now, you are prepared to install the new Sitecore instance.
Happy Sitecoreing 😊



Uninstalling a Sitecore instance manually can be complex, requiring careful steps to avoid errors. Many professionals prefer automation, but expertise matters. Businesses often choose to Hire Sitecore Developers for smooth setup, maintenance, or uninstall processes to ensure system integrity.
ReplyDelete