Getting Start With Docker: Part-1
What is Docker? Let's say you created an application and it's working fine on your local machine, but in QA or Prod, it's not working properly. So, it's a common statement that it's working on my machine does not know why it's not working there😊.
The reason can be libraries, version mismatch, framework, dependencies or you have upgraded any dependencies to solve the issue and forget, or any other reason and other developer machines and environments do not have all of these.
Hence Docker Desktop is an easy-to-install application for your Mac or Windows environment that enables you to build and share containerized applications and microservices using containers. Docker is an open-source project for automating the deployment of applications as portable, self-sufficient containers that can run on the cloud or on-premises.
In a container-based approach, the host operating system’s kernel and resources are directly shared by the container through the Docker daemon. This means that the containers are far more lightweight, use lesser memory, and are faster than a virtual machine.

For a more in-depth comparison, refer to Containers vs. virtual machines.
For more about Docker and its Terminology, refer to Containers in Sitecore development
Install Docker:
Before installing Docker desktop on your machine, verify the below things:
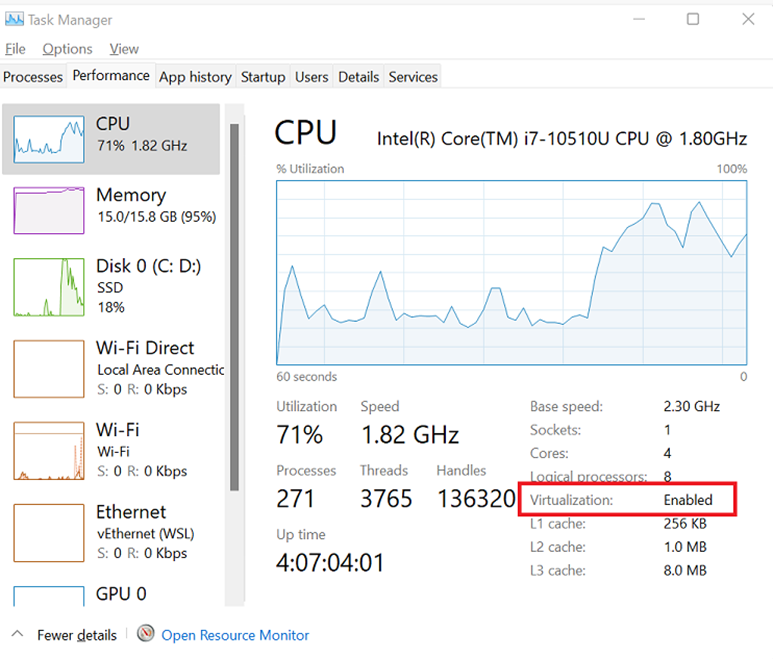
- Virtualization should be enabled on your machine:
- Hyper-V:
Go to the Turn Windows Features On or Off window using the control panel or press window plus R key and open Run Prompt and type optionalfeatures.exe and hit enter:
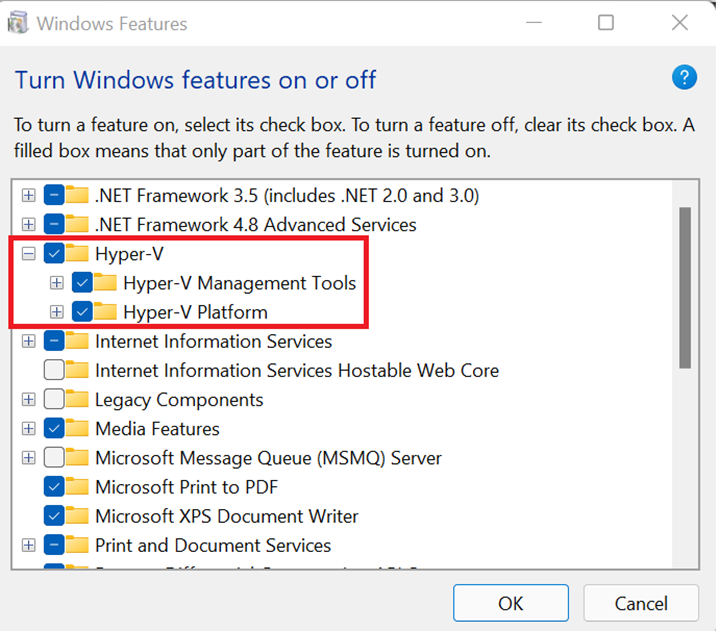
If you are not able to find the Hyper-v options in the Turn Windows Features on or off window then perform the below steps to install it (It is for Windows 11 Home edition)
Copy-paste the below script into the notepad and save it with the “.bat” extension instead of “.txt". I have named it “Hyper-V.bat”.
  pushd "%~dp0"
  dir /b %SystemRoot%\servicing\Packages\*Hyper-V*.mum >hyper-v.txt
  for /f %%i in ('findstr /i . hyper-v.txt 2^>nul') do dism /online /norestart /add-package:"%SystemRoot%\servicing\Packages\%%i"
  del hyper-v.txt
  Dism /online /enable-feature /featurename:Microsoft-Hyper-V -All /LimitAccess /ALL
  pause
Right-click on the “Hyper-V.bat” batch file and run as an administrator (You need to connect with the internet). Once the installation will be done, restart your computer and verify the Hyper-V options in the Window feature window. Select the option and install it.
Now you are good to go with Docker installation. Here I am writing the installation steps for both Windows 11 Home and Pro editions.
Download docker from here and install it.
- Windows 11 Home edition:
- After successful installation clicks on the docker icon. It will run your docker. But wait...
- If you don’t have the Linux kernel update package on your windows machine then you will get the below error on your machine:
- Window 11 Pro edition:
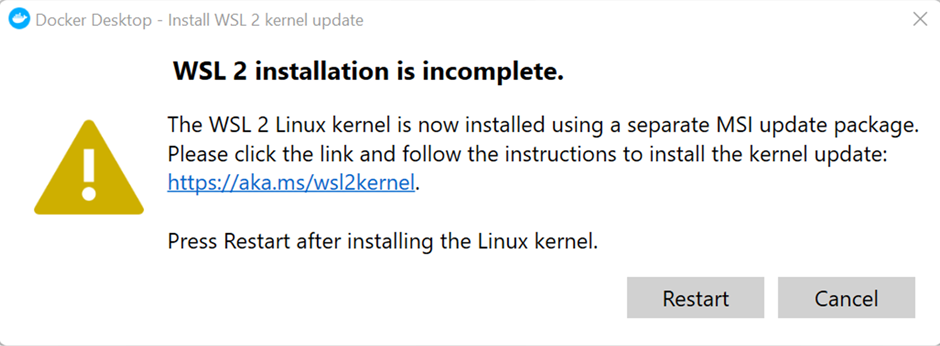
Click on the link from your window or install the Linux kernel update package from here.
After successful installation clicks on the docker icon. If you get the below error message:
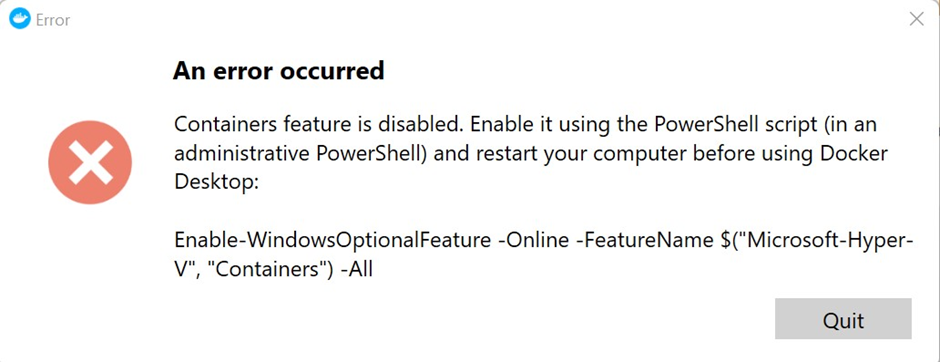
then open the Powershell window in admin mode and execute the below command:
Enable-WindowsOptionalFeature -Online -FeatureName $(“Microsoft-Hyper-V”, “Containers”) -all
Restart the machine and run the docker.
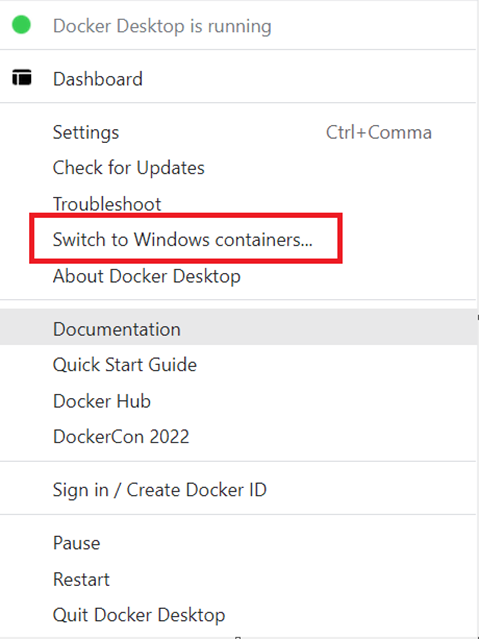
After successfully setup is done, check that docker is running or not and switch it to the windows container.
Right-click on the Docker icon in the taskbar and choose Switch to Windows containers.
Verify the installation:
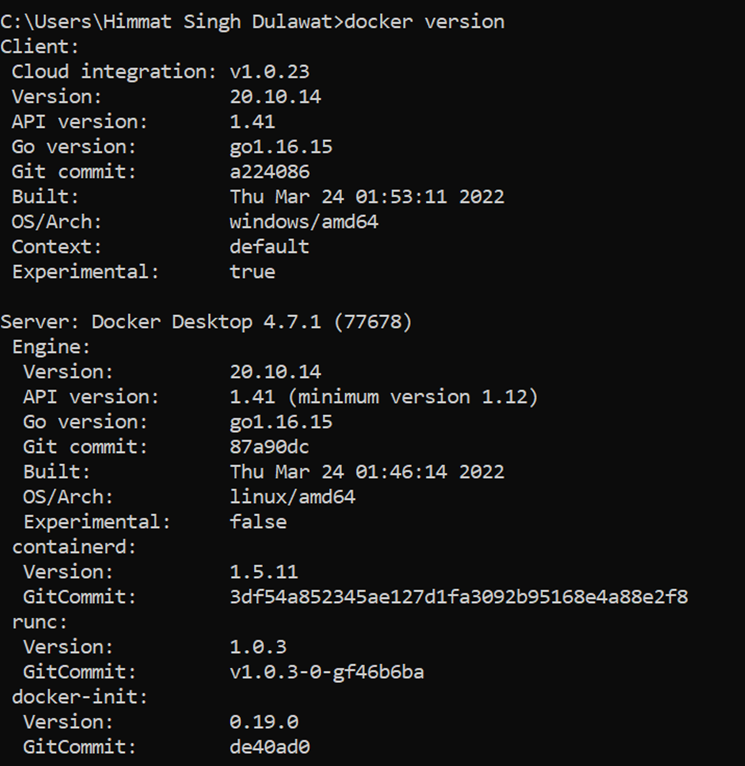
Open PowerShell or command window and execute the command: docker version
The next step is we need to set DNS, its an IP address of a DNS server. To specify multiple DNS servers, use multiple --DNS flags. If the container cannot reach any of the IP addresses you specify, Google’s public DNS server 8.8.8.8 is added, so that your container can resolve internet domains.
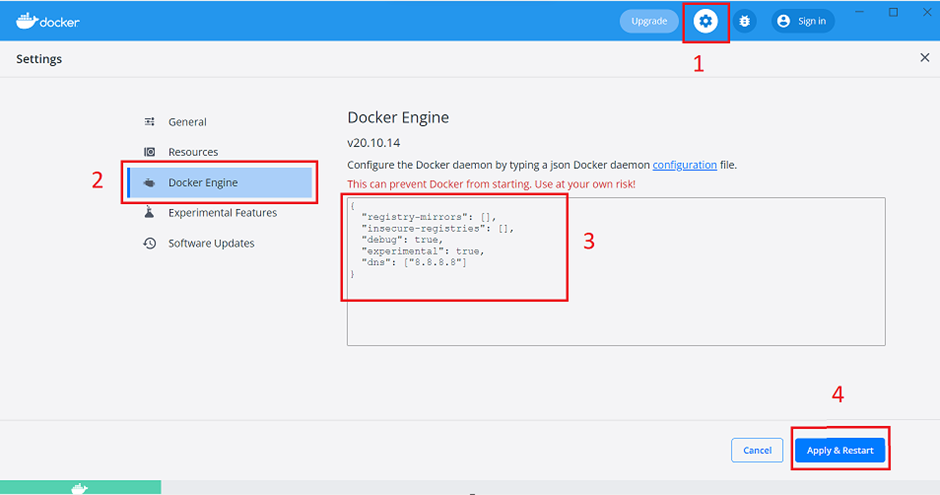
Try to bypass some common network issues by setting DNS servers in the Docker engine configuration:
- Open Docker Desktop and then select Settings => Docker Engine
- Ensure the value of the "DNS" key is set to ["8.8.8.8"]
- Ensure the Windows Docker engine experimental features are enabled (to allow the Linux SMTP container to run at the same time as the Windows containers)
- Click Apply & Restart button
Now all is good and you can start with your development.
Uninstall Docker Desktop:
To uninstall Docker Desktop from your Windows machine:
- From the Windows Start menu, select Settings > Apps > Apps & features.
- Select Docker Desktop from the Apps & features list and then select Uninstall.
- Click Uninstall to confirm your selection.
Important: Uninstalling Docker Desktop destroys Docker containers, images, volumes, and other Docker-related data local to the machine, and removes the files generated by the application. Refer to the backup and restore data section to learn how to preserve important data before uninstalling.
Reference:
Happy Sitecoreing 😊



Comments
Post a Comment