Install Horizon 10.2 with Sitecore XM
There are plenty of documents and blogs available on installing Horizon with Sitecore XP Experience Platform but this blog is related with install Sitecore Horizon with Sitecore XM Experience Manager.
Horizon is the next-generation editor in the Sitecore Experience Platform. Horizon comprises two editing tools where you can create and edit content.
Before installing Horizon, you need to install the below prerequisites for Sitecore 10.2:
- Install Sitecore Experience Manager 10.2
- Make sure your Sitecore CM site is working correctly with the HTTPS protocol.
- Ensure Sitecore Identity is installed
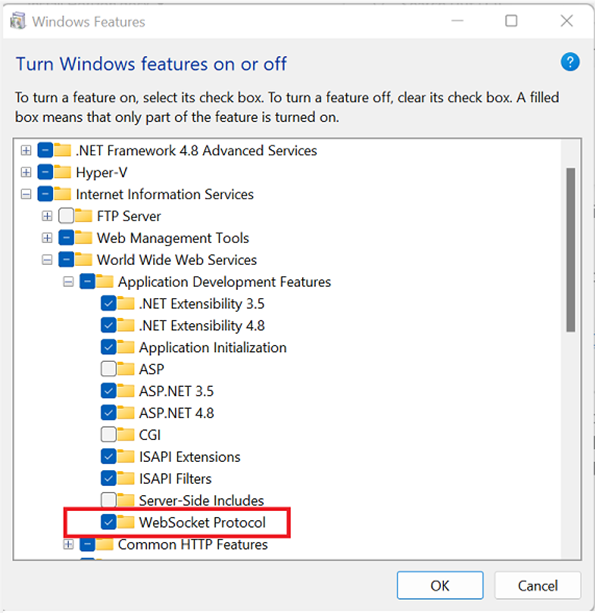
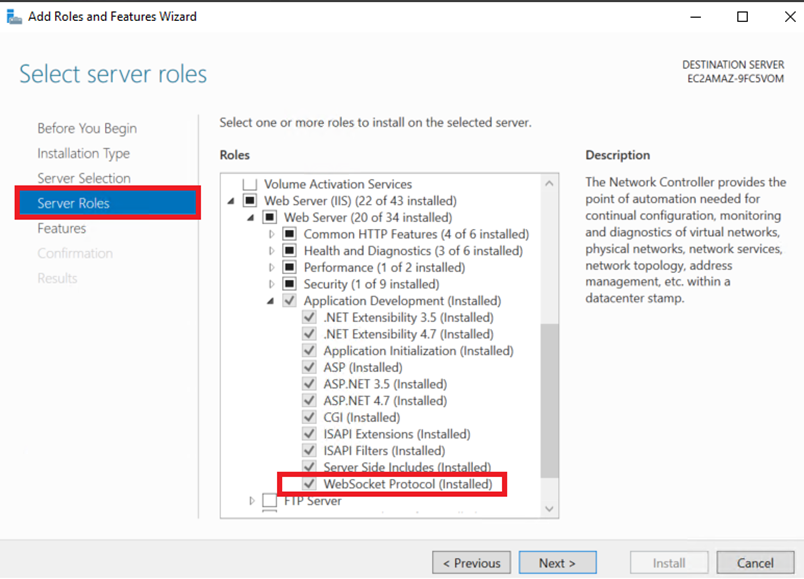
- Install WebSocket Protocol installed in IIS
-
If you are on a local developer machine: Go to the Turn Windows Feature on
or off from the Programs and Features option in Control Panel.
-
If you are on Virtual Machine: Go to Server Manager, and select the Add
roles and feature option in the right panel.
- Sitecore Installation Framework 2.3.0
- ASP.NET Core/.NET Core: Runtime & Hosting Bundle 3.1.15 x64
After you install the all prerequisite, restart your machine.
Installation:
-
Go to the Sitecore Download website and search for Sitecore Horizon 10.2.0,
click on it and download Sitecore Horizon for On Premises deployment under
Download options
or you can directly download it from here.
-
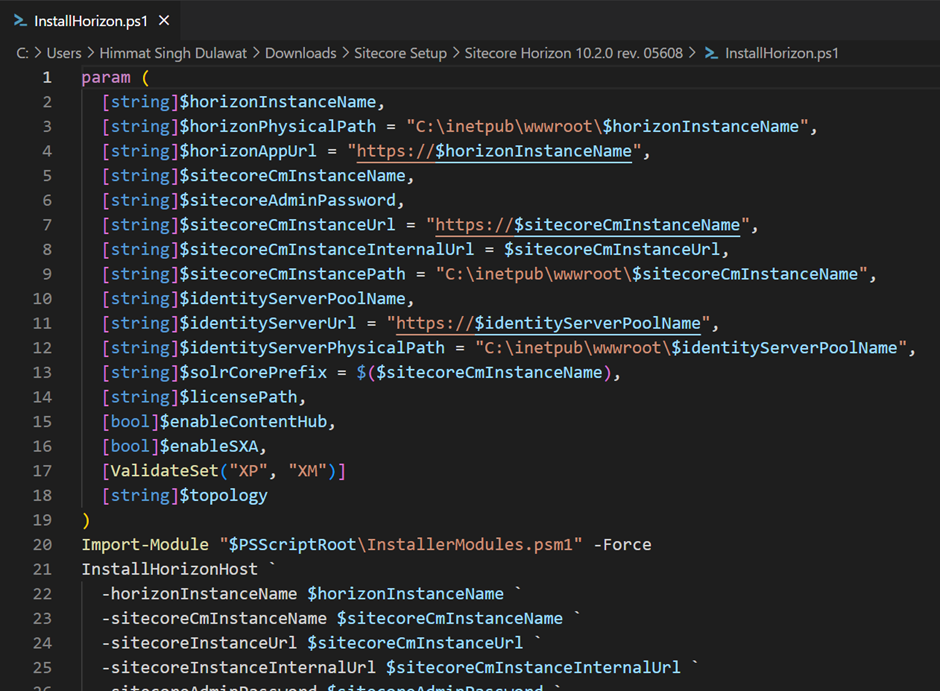
Extract the package Sitecore Horizon 10.2.0 rev. 05608 and open
InstallHorizon.ps1 file:
-
Update only the following highlighted field value in InstallHorizon.ps1 as
per your installed Sitecore instance.
Note: $solrCorePrefix: The prefix of the Sitecore Solr core index for Horizon. Make sure it is aligned with the prefix for the sitecore_master_index from your current deployment.
-
After, modifying the parameter values in InstallHorizon.ps1 file, open a
PowerShell window in administrator mode and execute the InstallHorizon.ps1
script.
Note: If you face the error regarding the execution policy then set the execution policy or bypass it on your machine.
-
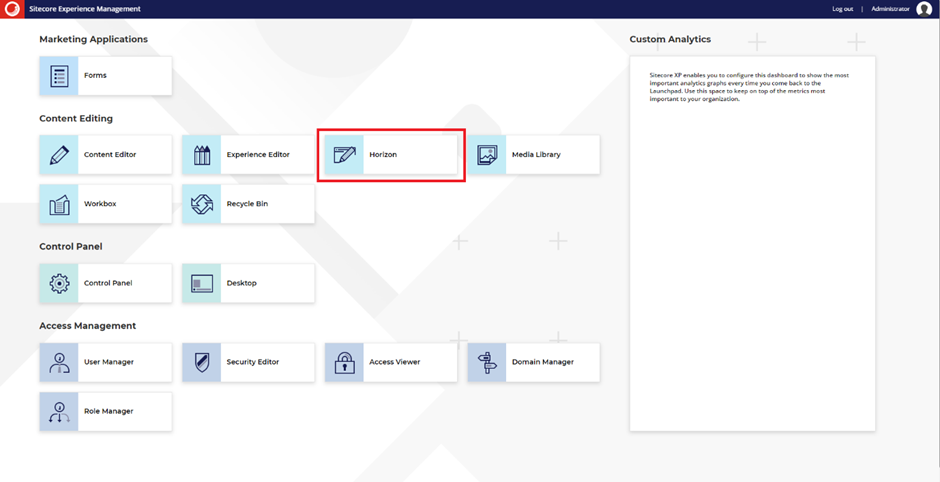
Once installation is complete, go to the Sitecore launchpad and check the
Horizon icon.
-
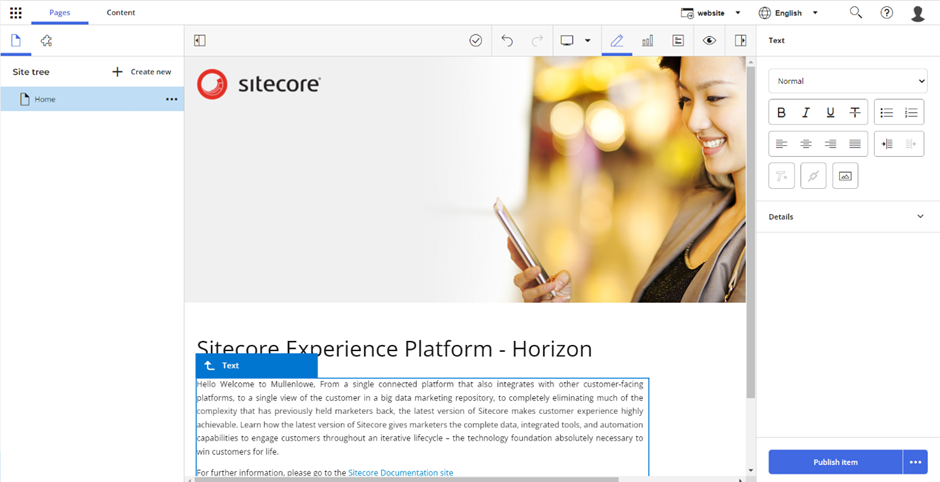
Click on the Horizon icon, it will redirect you to the Horizon page:
Update the style sheet
Before you can use the alignment and indentation features in the rich text editor in Horizon, you must define some styles in your style sheet. To enable alignment and indentation in the rich text editor, Add the following lines to your default style sheet.
Note: Here default style sheet is your website’s default style sheet instead of Horizon, so don’t get confused.
Prepare the Solr search engine
For the search feature to work in Horizon, after you deploy Horizon, you must populate the Solr managed schema and build the Horizon index.
To prepare the Solr search engine for Horizon:
- Log into Sitecore
- On the Sitecore Launchpad, click Control Panel
- In the Indexing section, click Populate Solr Managed Schema.
- In the Schema Populate dialog box, ensure that the sitecore_horizon_index and the sitecore_master_index checkboxes are selected.
- Click Populate
- When the Schema Populate dialog box indicates that the indexes have been populated successfully, click Close.
- On the Control Panel, in the Indexing section, click Indexing Manager.
- In the Indexing Manager dialog box, select the sitecore_horizon_index and the sitecore_master_index checkboxes, and then click Rebuild.
- When the search indexes have been rebuilt, click Close.
In my next blog, I will discuss some Horizon pre- and post-installation issues/errors and their fixes.
Happy Sitecoreing 😊




Comments
Post a Comment